Blog postAngular app with PHP backend: part 2 (POST)

Learn to code Angular app with PHP backend: part 2 (POST)


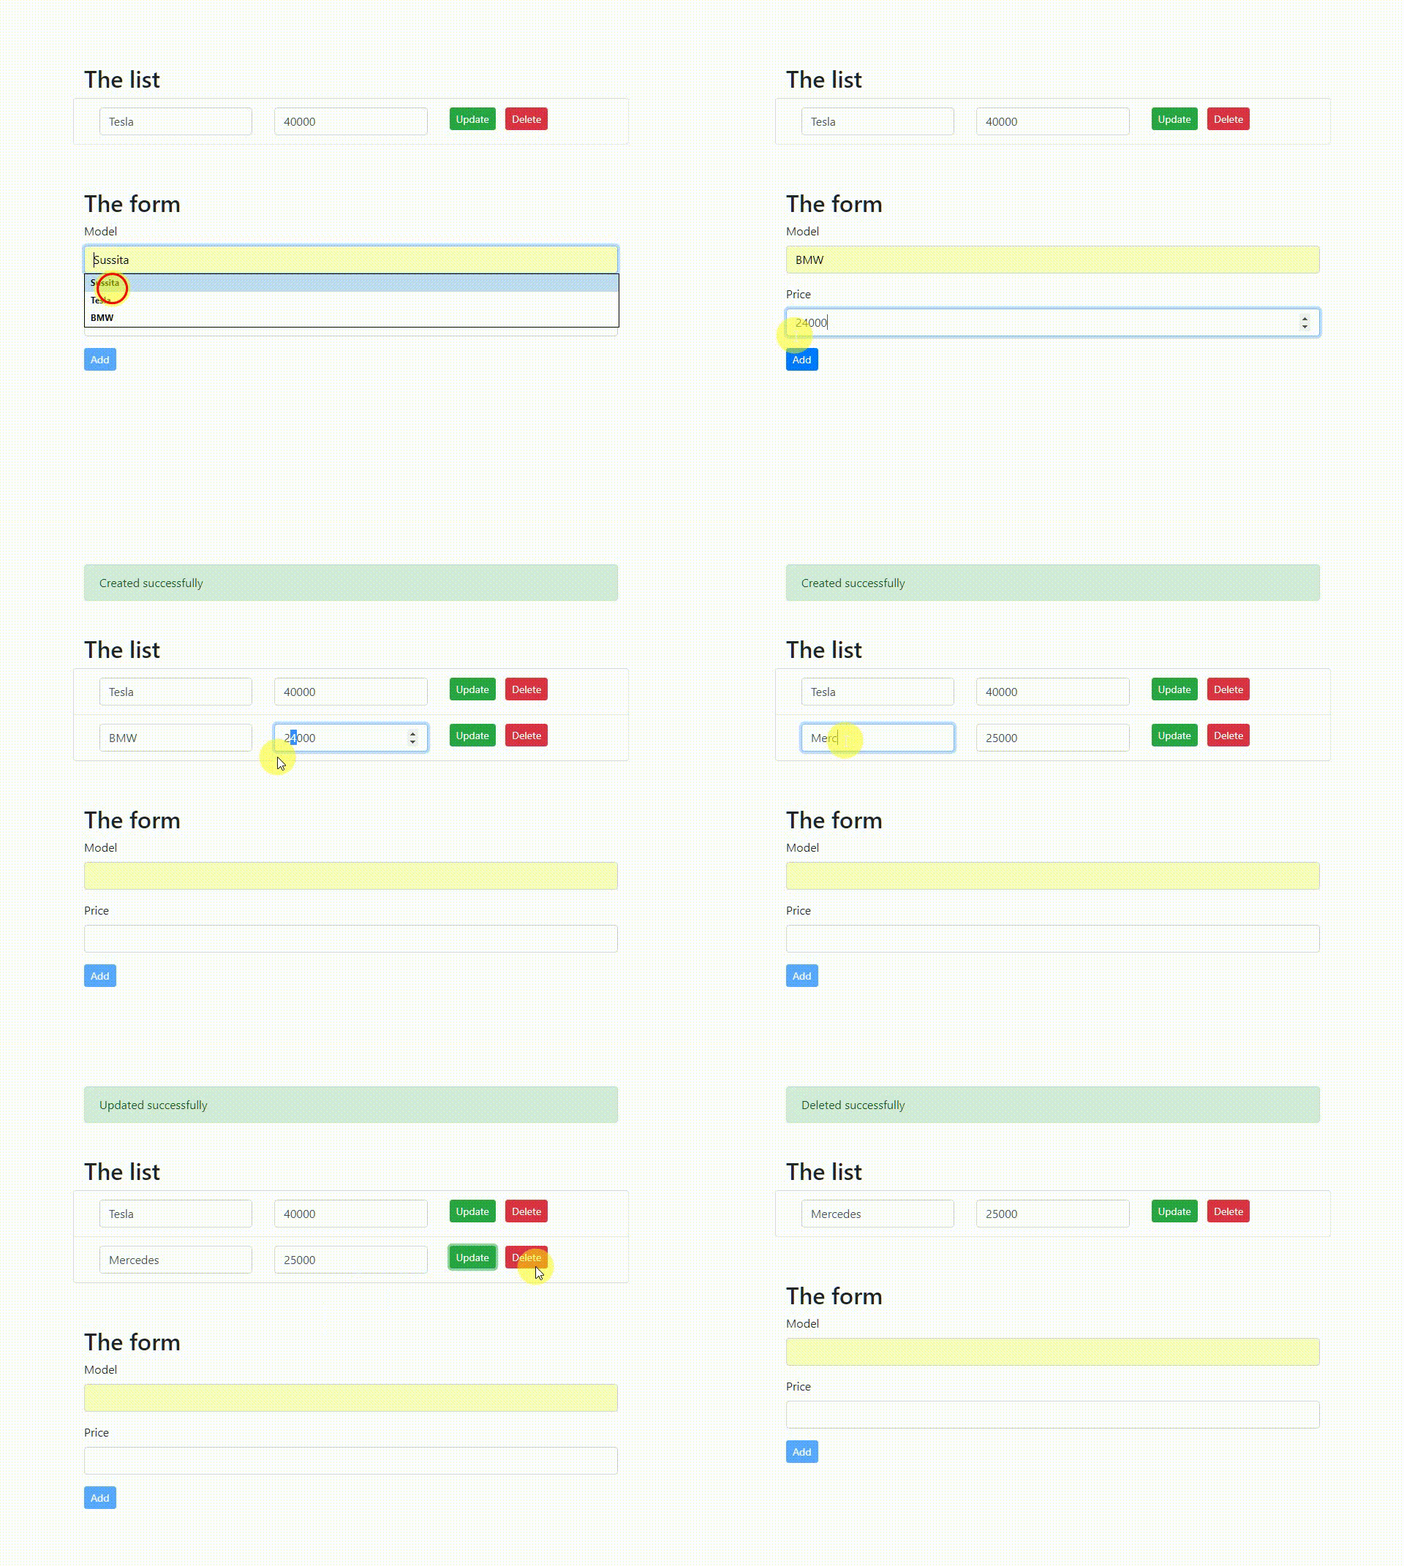
This is the second tutorial in the series about coding an Angular app with a PHP backend. In the previous tutorial, we fetched the list of items from the PHP backend and printed it inside an Angular component. In this one, you will develop a form to which the users can enter the model name and price before posting the data to the server side.

Demo for the Angular and PHP application

All the tutorials in the series about developing Angular and PHP application:

  1. How to install Angular?
  2. What is REST API? In plain English
  3. What is Angular Observable?
  4. Angular app with PHP backend: part 1 (GET)
  5. Angular app with PHP backend: part 2 (POST)
  6. Angular app with PHP backend: part 3 (PUT)
  7. Angular app with PHP backend: part 4 (DELETE)

Click to see the code in action

You can dowload the source code from the conclusion section

# 1. Working with Angular forms

To be able to work with Angular forms, you first need to import the FormsModule to the core module of the application:

src/app/app.module.ts

import { BrowserModule } from '@angular/platform-browser';
import { FormsModule } from '@angular/forms';

import { NgModule } from '@angular/core';
import { HttpClientModule } from '@angular/common/http';

import { AppComponent } from './app.component';

@NgModule({
  declarations: [
    AppComponent
  ],
  imports: [
    BrowserModule,
    HttpClientModule,
    FormsModule
  ],
  providers: [],
  bootstrap: [AppComponent]
})
export class AppModule { }

It is not enough to import the FormsModule you also need to add it's symbol to the imports array.

In order to implement Angular forms you also need to import NgForm to the relevant component:

src/app/app.component.ts

import { Component, OnInit } from '@angular/core';
import { NgForm } from '@angular/forms';

import { Car } from './car';
import { CarService } from './car.service';

@Component({
  selector: 'app-root',
  templateUrl: './app.component.html',
  styleUrls: ['./app.component.css'],
})

export class AppComponent implements OnInit {
  cars: Car[] = []
  
  error = '';
  success = '';
  
  constructor(private carService: CarService) {}

  ngOnInit() {
    this.getCars();
  }

  getCars(): void {
    this.carService.getAll().subscribe(
      (data: Car[]) => {
        this.cars = data;
        this.success = 'Success in retrieving the list';
      },
      (err) => {
        console.log(err);
        this.error = err.message;
      }
    );
  }
}

# 2. The service

Now you need to add the store() method to the service. The same service which we started to develop in the previous tutorial.

src/app/car.service.ts

store(car: Car) {
    return this.http.post(`${this.baseUrl}/store`, { data: car }).pipe(
      map((res: any) => {
        return res['data'];
      })
    );
}
  • We use the httpClient's post() method to send the data to the server side. The method accepts the URL as the first parameter and the car object as the second.
  • The method sends back to its subscribers the data about the newly created car including the model, price, and id.

The full code of the service:

src/app/car.service.ts

import { Injectable } from '@angular/core';
import { HttpClient } from '@angular/common/http';

import { map } from 'rxjs/operators';
import { Car } from './car';

@Injectable({
  providedIn: 'root',
})
export class CarService {
  baseUrl = 'http://localhost/api/';

  constructor(private http: HttpClient) {}

  getAll() {
    return this.http.get(`${this.baseUrl}list`).pipe(
      map((res: any) => {
        return res['data'];
      })
    );
  }

  store(car: Car) {
    return this.http.post(`${this.baseUrl}/store`, { data: car }).pipe(
      map((res: any) => {
        return res['data'];
      })
    );
  }
}

# 3. The component

In the previous tutorial, we developed the getCars() method that brings the list of cars. In this one, we'll write the addCars() method that adds a car.

You need to initialize the car object by implementing the Car interface which requires the model and price fields:

src/app/app.component.ts

car: Car =  {model:'', price:0};

Now, you can add the addCar() method that receives the values entered into the form before sending them to the service.

Add the following code beneath the getCars() method:

src/app/app.component.ts

addCar(f: NgForm) {
    this.resetAlerts();

    this.carService.store(this.car).subscribe(
      (res: Car) => {
        // Update the list of cars
        this.cars.push(res)

        // Inform the user
        this.success = 'Created successfully';

        // Reset the form
        f.reset();
      },
      (err) => (this.error = err.message)
    );
}

The f parameter is of type NgForm so it holds everything that Angular thinks you need to know about the form that we're going to build in the next part of the tutorial.

In the case of success, Angular's reset() method will reset the form, including the values and classes.

addCar() sends the values that the users feed the form with to the store() method of the service, and subscribes to the output.

The store() method is an observable and so addCar() needs to subscribe to it in order to send the data to the service. To improve your understanding read the tutorial about Observables.

We expect the Observable to return one of two results: success or failure.

The full code for the component needs to look something like this:

src/app/app.component.ts

import { Component, OnInit } from '@angular/core';
import { NgForm } from '@angular/forms';

import { Car } from './car';
import { CarService } from './car.service';

@Component({
  selector: 'app-root',
  templateUrl: './app.component.html',
  styleUrls: ['./app.component.css'],
})

export class AppComponent implements OnInit {
  cars: Car[] = [];
  car: Car =  {model:'', price:0};

  error = '';
  success = '';

  constructor(private carService: CarService) {}

  ngOnInit() {
    this.getCars();
  }

  getCars(): void {
    this.carService.getAll().subscribe(
      (data: Car[]) => {
        this.cars = data;
        this.success = 'Success in retrieving the list';
      },
      (err) => {
        console.log(err);
        this.error = err.message;
      }
    );
  }

  addCar(f: NgForm) {
    this.resetAlerts();

    this.carService.store(this.car).subscribe(
      (res: Car) => {
        // Update the list of cars
        this.cars.push(res)

        // Inform the user
        this.success = 'Created successfully';

        // Reset the form
        f.reset();
      },
      (err) => (this.error = err.message)
    );
  }

  resetAlerts() {
    this.error = '';
    this.success = '';
  }
}
# 4. The HTML

You need to copy and paste the HTML code for the form just above the list that we developed in the previous tutorial

The Angular form:

src/app/app.component.html

<div id="theForm">
  <h2>The form</h2>
  <form #f="ngForm" name="theForm" (submit)="addCar(f)">
    <div class="form-group">
      <label>Model</label>
      <input type="text"
            class="form-control"
            name="model"
            [(ngModel)]="car.model"
            #carModel="ngModel"
            required
            pattern="^[a-zA-Z ]+$">
      <span class="help-block danger" *ngIf="carModel.errors?.required && carModel.touched">
        The model name is required
      </span>
      <span class="help-block danger" *ngIf="carModel.errors?.pattern && carModel.touched">
        The model name can only contain the letters a-z or A-Z
      </span>
    </div>

    <div class="form-group">
      <label>Price</label>
      <input type="number"
            class="form-control"
            name="price"
            required
            [(ngModel)]="car.price"
            #carPrice="ngModel">
      <span class="help-block danger" *ngIf="carPrice.errors?.required && carPrice.touched">
        The price is required
      </span>
    </div>

    <button
        class="btn btn-primary btn-sm"
        [disabled]="f.invalid">Add</button>
  </form>
</div>

There's quite a lot happening in the form so if you feel that you need a refresher on the subject of Angular forms you better read the tutorial.

  • The values of the form fields have a two-way binding to the Car object in the component with the help of ngModel.
  • I have attached validation rules to the fields, so if the data in the field is not valid, the field gets the "danger" CSS class.
  • You can submit the form only if it is valid. Unless it is valid, the update button is disabled.
  • Submitting the form passes the data in the form to the component through a local reference #f with the addCar() method.

# 5. The server side

The following PHP code handles the storage of data on the server side:

api/store.php

<?php
require 'connect.php';

// Get the posted data.
$postdata = file_get_contents("php://input");

if(isset($postdata) && !empty($postdata))
{
  // Extract the data.
  $request = json_decode($postdata);
	

  // Validate.
  if(trim($request->data->model) === '' || (int)$request->data->price < 1)
  {
    return http_response_code(400);
  }
	
  // Sanitize.
  $model = mysqli_real_escape_string($con, trim($request->data->model));
  $price = mysqli_real_escape_string($con, (int)$request->data->price);
    

  // Store.
  $sql = "INSERT INTO `cars`(`id`,`model`,`price`) VALUES (null,'{$model}','{$price}')";

  if(mysqli_query($con,$sql))
  {
    http_response_code(201);
    $car = [
      'model' => $model,
      'price' => $price,
      'id'    => mysqli_insert_id($con)
    ];
    echo json_encode(['data'=>$car]);
  }
  else
  {
    http_response_code(422);
  }
}
  • The server returns a 400 status code in the case of an error (you can read the tutorial about status codes and the REST API).
  • In the case of success, the server returns a JSON object that contains the id, model and price of the newly created record in the database.

# Conclusion

Now, that you know how to create new records with the httpClient's post() method you are ready for the next tutorial. In the following tutorial, you will learn how to update an existing item with the put() method.

Click to download the source code for the tutorials

comments powered by Disqus