Blog postAngular app with PHP backend: part 3 (PUT)

Learn to code Angular app with PHP backend: part 3 (PUT)


This is the third tutorial in the series about coding an Angular app with a PHP backend. In the previous tutorial, we posted a new car to the backend so it can be stored in the database. In this one, we will edit the data using the HttpClient's put() method.

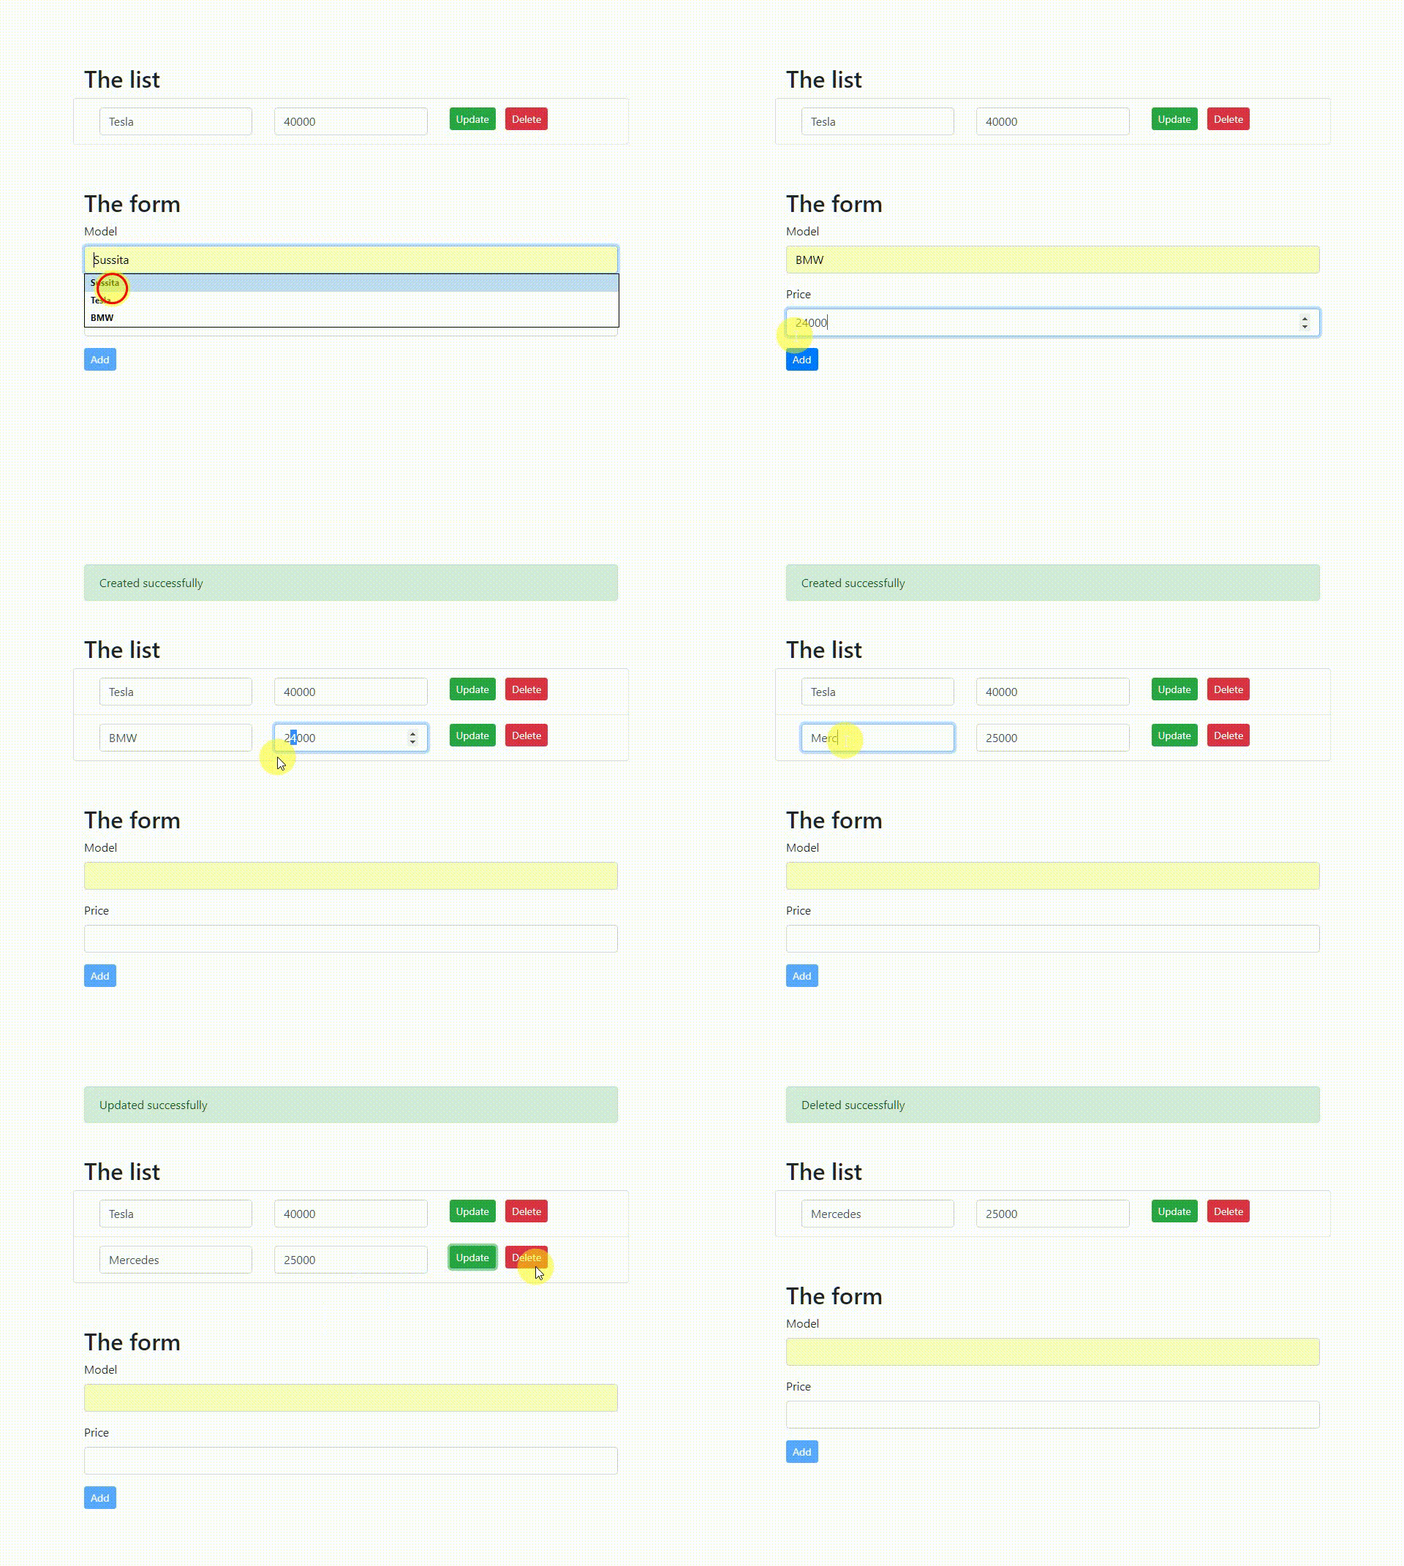
Demo for the Angular and PHP tutorial

All of the tutorials in the series about developing Angular and PHP application:

  1. How to install Angular?
  2. What is REST API? In plain English
  3. What is Angular Observable?
  4. Angular app with PHP backend: part 1 (GET)
  5. Angular app with PHP backend: part 2 (POST)
  6. Angular app with PHP backend: part 3 (PUT)
  7. Angular app with PHP backend: part 4 (DELETE)

Click to see the code in action

You can dowload the source code from the conclusion section

# 1. The service

Add the update() method to the service.

The method receives the data about the car from the component only to send it to the PHP backend with the HttpClient's put() method.

src/app/car.service.ts

update(car: Car) {
    return this.http.put(`${this.baseUrl}/update`, { data: car });
}
  • The httpClient's put() method accepts the URL as the first parameter and the data (car object) as the second.
  • The server side (as you'll see in a moment) returns only success or error codes in the response header.
  • The server response is then sent to the subscriber in the component.

The full code for the service:

src/app/car.service.ts

import { Injectable } from '@angular/core';
import { HttpClient } from '@angular/common/http';

import { map } from 'rxjs/operators';
import { Car } from './car';

@Injectable({
  providedIn: 'root',
})
export class CarService {
  baseUrl = 'http://localhost/api/';

  constructor(private http: HttpClient) {}

  getAll() {
    return this.http.get(`${this.baseUrl}list`).pipe(
      map((res: any) => {
        return res['data'];
      })
    );
  }

  store(car: Car) {
    return this.http.post(`${this.baseUrl}/store`, { data: car }).pipe(
      map((res: any) => {
        return res['data'];
      })
    );
  }

  update(car: Car) {
    return this.http.put(`${this.baseUrl}/update`, { data: car });
  }
}

# 2. The component

Add the updateCar() method to the component. The method gets the values from the form and subscribes to the update() method in the service.

src/app/app.component.ts

updateCar(name: any, price: any, id: any) {
    this.resetAlerts();

    this.carService
      .update({ model: name.value, price: price.value, id: +id })
      .subscribe(
        (res) => {
          this.success = 'Updated successfully';
        },
        (err) => (this.error = err)
      );
}

The method updateCar() subscribes to the update() method in the service since it is an observable, and so the update() method returns one of two results:

  1. In the case of an error, the method exposes the error message to the user.
  2. In the case of success, the method will print a success message.

The full code of the component:

src/app/app.component.ts

import { Component, OnInit } from '@angular/core';
import { NgForm } from '@angular/forms';

import { Car } from './car';
import { CarService } from './car.service';

@Component({
  selector: 'app-root',
  templateUrl: './app.component.html',
  styleUrls: ['./app.component.css'],
})
export class AppComponent implements OnInit {
  cars: Car[] = [];
  car: Car = { model: '', price: 0 };

  error = '';
  success = '';

  constructor(private carService: CarService) {}

  ngOnInit() {
    this.getCars();
  }

  getCars(): void {
    this.carService.getAll().subscribe(
      (data: Car[]) => {
        this.cars = data;
        this.success = 'Success in retrieving the list';
      },
      (err) => {
        this.error = err.message;
      }
    );
  }

  addCar(f: NgForm) {
    this.resetAlerts();

    this.carService.store(this.car).subscribe(
      (res: Car) => {
        // Update the list of cars
        this.cars.push(res);

        // Inform the user
        this.success = 'Created successfully';

        // Reset the form
        f.reset();
      },
      (err) => (this.error = err.message)
    );
  }

  updateCar(name: any, price: any, id: any) {
    this.resetAlerts();

    this.carService
      .update({ model: name.value, price: price.value, id: +id })
      .subscribe(
        (res) => {
          this.success = 'Updated successfully';
        },
        (err) => (this.error = err)
      );
  }

  resetAlerts() {
    this.error = '';
  }
}
# 3. The HTML

Remember the list that shows the name and price of the car (if it doesn't ring a bell, then start with the first tutorial in the series). We will add editing capabilities to the form, including an option to update the price and name of each item separately. In addition to a button, that once clicked sends the data for further handling in the component's class.

Replace the content of the list with the following code:

src/app/app.component.html

<div id="theList">
  <h2>The list</h2>

  <div class="container">
    <div *ngFor="let item of cars;let i = index;" class="row">
      <div class="col-4">
        <input type="text"
               [(ngModel)]="cars[i].model"
               class="form-control"
               required
               pattern="^[a-zA-Z ]+$"
               #model="ngModel"
               [ngClass]="{ 'is-invalid': model.touched && model.invalid }">
      </div>
      <div class="col-4">
        <input type="number"
               [(ngModel)]="cars[i].price"
               class="form-control"
               required
               #price="ngModel"
               [ngClass]="{ 'is-invalid': price.touched && price.invalid }">
      </div>
      <div class="col-4">
        <input type="button"
               value="Update"
               class="btn btn-success btn-sm"
               [disabled]="model.invalid || price.invalid"
               (click)="updateCar(model, price, item.id)">
      </div>
    </div>
  </div>
</div>
  • Angular prints each item (car) to a separate line of the list.
  • The values of the form fields have a two-way binding to the Car object in the component with the help of ngModel.
  • The model and price fields have local references (#model, #price).
  • I have attached validation rules to the fields, so if the data in the field is not valid, the field gets the "is-invalid" CSS class.
  • You can submit the form only if it is valid. Unless it is valid, the update button is disabled.
  • Pushing the "update" button passes the data to the component with the updateCar() method.

# 4. The server side

The following PHP code is responsible for updating the database on the server side of the app:

api/update.php

<?php
require 'connect.php';

// Get the posted data.
$postdata = file_get_contents("php://input");

if(isset($postdata) && !empty($postdata))
{
  // Extract the data.
  $request = json_decode($postdata);
	
  // Validate.
  if ((int)$request->data->id < 1 || trim($request->data->model) == '' || (int)$request->data->price < 1) {
    return http_response_code(400);
  }
    
  // Sanitize.
  $id    = mysqli_real_escape_string($con, (int)$request->data->id);
  $model = mysqli_real_escape_string($con, trim($request->data->model));
  $price = mysqli_real_escape_string($con, (int)$request->data->price);

  // Update.
  $sql = "UPDATE `cars` SET `model`='$model',`price`='$price' WHERE `id` = '{$id}' LIMIT 1";

  if(mysqli_query($con, $sql))
  {
    http_response_code(204);
  }
  else
  {
    return http_response_code(422);
  }  
}
  • In case of error, the code returns a response code from the 400 family (you can read the tutorial about status codes and the REST API).
  • In the case of success, a response code 204 is returned, which indicates that the operation was successful but no data is returned in the response body.

# Conclusion

Now, that you know how to update records with the httpClient's put() method you are ready for the next tutorial in which you'll learn how to delete list items.

Click to download the source code for the tutorials

comments powered by Disqus